Monday, 30 April 2012

School Writing - An iPad App Review


I was lucky enough to be given a copy of the School Writing app by demografix to trial with my class. After only two weeks of playing around with it, I feel I am only beginning to uncover the possibilities of how this fantastic app can be used with my students.

School Writing is a well-designed and thoughtfully planned app that can be used to assist children in developing handwriting, word recognition and spelling skills.
The app is comprehensive and packed with useful features but is still simple to use.
On first downloading and opening this app I was pleasantly surprised that it allowed me to quickly and easily add enough users for my entire class, as well as a “teacher” user that I created so I could play with the app myself and become more familiar with its many features.
School Writing comes preloaded with plenty of lessons to keep a class busy for a long time, but then it also allows teachers to create their own lessons to suit a particular focus or need.
Even though the name suggests that it is for teaching and practising writing skills only, it has prewriting activities (traceable shapes, mazes and dot to dots) as well as some numeral activities.
For early learners, the app could be used to develop tracing skills, numeral and letter recognition and formation skills.
Some of the preloaded activities include lists of Dolch words, word lists based around sounds and pairs of opposites.
The font setting can be changed to match Australian, New Zealand, US and UK school fonts in both print and pre-cursive styles. For print fonts there is also a choice between solid, dotted or outlines with starting points marked in.
I used this app in my classroom with some of my struggling spellers. I was quickly and easily able to add in my weekly spelling list and had the option of replacing some or all of the letters with dashes to make it more challenging, as well as recording the spoken word, with a sentence if preferred. This gave them an opportunity to practise their writing at the same time as their spelling. As soon as they finished the lesson, the app emailed me a file that I can view on my computer to check to see how they went.
Adding the list to one iPad with multiple users was a very simple process, and with the ability to import and export word lists via the demografix website, DropBox or iTunes, adding the weekly spelling list to multiple iPads is probably relatively painless too.
My brain is ticking over with the possible applications for this app in my own classroom in the future. Having individualised spelling lists in the past has been difficult to administer and time-consuming, but with this app it would be possible to set up customised lists. If the words were entered as blanks and the word and sentence was recorded in the app, then my students could take their spelling tests on their own and they would be emailed to me once they were done. This would mean that the students who worked more quickly would not be frustrated while waiting for the slower ones to finish and the child who invariably doesn’t hear the word due to distractions and is three words behind the rest of the class every week could listen to the word as many times as they needed and not feel pressured by everyone else who needs to move on. Also, any child who was out at the time of the test could take it at another time.
I am wondering if this app would work through a VGA adaptor so that students could write the words on the IWB. I don’t have a VGA adaptor, but if I did then having students trace the words in enormous letters would be another fun way for them to practise their spelling and letter shapes, and would be a good “midline-crossing” exercise.
Lessons to focus on word families and rhyming would be a cinch to create using School Writing.
The ability to record the student’s voice enables teachers to assess sight word recognition, or oral sentence construction using a list of words as well.
Because of the number of ways that this app can be customised, its application in the classroom or for home learning is extremely flexible and I am sure that as I become more familiar with the range of settings, I will find many more ways to use the School Writing app to support my learners.
If you are interested in finding out more about this app, visit the demografix website

Saturday, 28 April 2012

Cows Moo Softly - Variables in Science

When teaching science I try very hard to make sure that we are truly doing science and not just another English lesson with a Science theme. I also try to help my students to make connections with the scientific process we are using by using a similar format (question - hypothesis - method - results - conclusion).
I introduce scientific words in context as I think my students are ready for this. They love the big words!
One of the important scientific ideas is setting up a fair test. In order to do this children need to begin to understand variables and how we can control these when we are doing a test.
Cows Moo Softly is a mnemonic for Change - Measure - Stay the Same and is easier for my students to grasp than "independent variables" and "dependent variables".
I have made some new charts that can be used to help kids to think about variables when they are doing science.

There are some that can be printed onto coloured paper and laminated to use as class signs. I pin this type of sign to my board (using blu-tac or magnets) and write next to it. That way I can reuse them over and over and my board work is a bit more pleasing to look at than my own scribble writing.
I have also squeezed the three parts onto one page that could be photocopied and used for individuals or groups to plan their experiment.
If you would like these files for your room, you can download them for free from my TPT store.
Click here for the signs.  Click here for the worksheet.
The cow is by Scrappin' Doodles - isn't she cute?

Learning through Movement


We all know how hard it is to get kids to sit still for too long so it is great to get fresh ideas for teaching through movement. That's why it is so exciting to be part of the Move to Learn Linky Party at Minds in Bloom!
I am always careful to structure my sessions so we go from the floor to the desks and back again at least a few times so that we can regather and refocus as we need to.
A while ago I made this simple game to reinforce the difference between proper nouns and common nouns with my students.
It is basically a PowerPoint presentation that you play on the IWB or projector and the students bend low for a common noun, and stretch high for a proper noun (as in low for little letter and high for capital letter). Download it for free here.
It is simple to play and is a good brain-break at the same time as reviewing a key concept.

Other games I play with my kids to get them moving while I introduce or consolidate concepts are:
Columns, Rows and Cells: I use this for spreadsheets or tables. Stand tall with arms up high for columns, spread arms out wide for rows, squat (into a little box) for cells.
Head, body, tail spelling: To highlight letter shapes, I spell out a spelling word (usually the children can see the word on the board at the same time) and they stretch up for a "head" letter (such as b, d, k, l, h, f etc), stand normally for a "body" letter (such as a, c, e, o, u, m, n etc) and squat for a "tail" letter (such as g, y, j, p etc).
Obtuse, acute, right: To practise angle words, students make the shapes with their arms as I call out the words.
All of these games can be played quickly as a warm-up, review or brain-break, or as an elimination game, and best of all, they require no special equipment or preparation so you can use them any time.

Check out the other great ideas at the Move to Learn Linky Party

Friday, 27 April 2012

Winding up our History mini-unit

For the past few weeks, we have been engaged with the new History content from the Australian Curriculum for Year 2.
Our focus has been on our local War Memorial, as a site of cultural significance, and this has led us into exploration of Anzac Day and its associated symbols.
I have enjoyed the opportunity to make the history component of our learning more engaging for the students through a variety of craft activities.
I have written posts about these over the past few weeks during my planning, but I wanted to show some of the finished products in case they might be of use to others in the future.
Here is an example of the finished slouch hat:
The template for the slouch hat activity is available through my TpT store.
We also baked Anzac biscuits. This activity linked to History, Science and English.
One of my favourite activities (because it was both simple and fun) was our poppy potato prints. We ended up doing these in several steps. First we painted a blue wash and sprinkled it with a pinch of salt. The salt soaks up some of the moisture so it leaves patterns that look like clouds in the blue sky, and added a bit of interest to the activity. Next, we used a dry brush technique to make some green stems. We didn't try to match the stems one-to-one with the flowers because we were going for the "field" effect. Thirdly, we printed some bright red poppies with the potatoes. Once they were dry, we used dabs of glue to attach some real poppy seeds to the flower centres.

It is a very simple piece but they look effective as a frieze along one wall of my classroom and it gave the students an opportunity to experiment with a few different techniques.
I have a freebie poem activity about poppies that goes nicely with this idea.
For assessment, the students used an iPad app, SonicPics, to sequence some photos of the memorial and record some thoughts about how it has changed over time.
Next week we have two more simple art activities planned to finish up our War Memorial mini-unit, as well as a concept map as an assessment piece.
The first art activity is a simple watercolour rosemary using a cotton tip as a brush:
And the second will be a photo montage with crayon and watercolour based on the artwork of Patricia Mullins in the book, Only a Donkey.

Saturday, 21 April 2012

Getting Set for Science

This term we are doing a chemistry unit in Science. Our work will be based on the "All mixed-up" unit from Primary Connections.
The Science Understanding content from the Australian Curriculum for this unit is: Different materials can be combined, including by mixing, for a particular purpose.
There are so many exciting ideas on Pinterest and in teaching blogs for potions and creative mixing, so I have been trying to organise all of my thoughts and ideas and work out how much is humanly possible for us to do in one term!
Yesterday I decided to get organised with all the basic ingredients and tools we will need to do the experiments in the Primary Connections unit, plus a few others that I know I won't be able to resist.

I am collecting recipes and procedures at the moment and am working on formatting them simply for my Year 2s to read. Then I hope they will be able to use the cards I make to follow directions and create something, then write a recount of their experience. This way I can do a little bit of reading and writing through the science. And plenty of art fun too!


I did a little science experiment myself this morning to test which of our paints was going to be best for our background wash on the poppy prints we will do. It will be a simple wash with salt sprinkle.
I used edicol paint (in khaki, although obviously we will use blue for the sky tomorrow)
acrylic paint mixed with water
and watercolour paints (from little trays)

I sprinkled them with salt while they were still wet to see which one gives the desired "cloud" effect.
I am tossing up between the edicol and the acrylic wash. The edicol worked immediately but the acrylic wash has turned out well after it is completely dry.
Science in art - I love it!

Term 2 Classroom Tour

I rearranged a few things over the Easter break and since I just love looking at photos of other people's classrooms and getting new ideas, I thought I would share mine, just in case I'm not the only one.
If you want to see my old layout, read this post: A Classroom Tour
Why the changes?
Well, I originally put my carpet square under most of my desks to absorb the noise. I am upstairs and on vinyl floors. Every time my kids get up from their desks or sit down again, there is a noise and it is heard downstairs. I had also wanted a large space at the back (side? not sure where the front of the room is...) near my display wall so it was easy to access. The problem was that I didn't end up with much floor space and during floor time when I really want them to be listening and focussed, they were cramped and distracted.
A big aim for me this term is to help them become more settled listeners. I am going to be reading Charlotte's Web to help build their listening stamina, and also introduce some meditative prayer.
I needed a big floor space, so now I have one.
The big floor space will mean that we can play more games and be more active too.
The drawbacks are that I have lost the "little spaces" around the room that were useful during read to self or if they were working in a group.
(And my downstairs colleagues will probably tell you that I am even noisier than before!)
I still have one little space at the back. So long as the teacher next door doesn't open the door and squash someone...
The big pink ball is on loan from the PE teacher. I am trialling it to see if it helps my kids with poor posture. The problem is that the novelty value hasn't worn off yet so it is a bit distracting. I think it might also be a tad too big for my Year 2s as well. If it is successful then I will look at getting a few of them. That should help with the novelty factor too.
Now my desks are in groups around the huge carpet square. There is not much space behind the desks but still enough for me to get to every child.


I am seriously considering changing my word wall completely. At the moment it is alphabetical but every time I need to change the back display I have to squeeze them over or spread them out again. The wonderwall and velcro dots make it pretty easy, but it would be even easier if I didn't have to do it!
I am also finding that they are really struggling with our grammar program. We are using a text, and while I loved this text in Year 4, it is really hard with Year 2 (partly because the new Australian Curriculum is harder too). There are too many new concepts being introduced before the last ones are consolidated. So... I'm going to rearrange my word wall with the words sorted according to the parts of speech instead.

This display has been up all year since about Week 2 but I have left it up until now because the students often use these "noun words" when writing. (And it looks great.) It has been more successful than the word wall. I'm just not sure if I can fit these anywhere else in the room to keep them. Maybe I will take them down and make them into a book.

So that's where I am at at the moment. Some of the changes are huge improvements but there is always a trade off. I am still happy with the feel of the space and it seems to be working - so far...

A Day to Remember

Yesterday afternoon I went along to the launch of Jackie French's new book about Anzac Day: A Day to Remember.

I had been quite fortuitous to have noticed the book and decided to borrow it straight away, since our teacher-librarian was just on her way to book herself in to go to the launch and invited me to join her if I liked.
I jumped at the chance to learn first hand about this book that looks like it will effectively support what I am trying to achieve through our Anzac mini-unit, and I am glad I did.
After acting like groupies and having our photos taken and books signed by both the author, Jackie French, and the illustrator, Mark Wilson, we were given the opportunity to hear from a gentlemen, now in his late eighties, who had served in World War II.
His story was so interesting that we insisted he tell us the rest of the story over a cup of coffee (which unfortunately for him, went cold because he was so busy answering all of our questions).
I am grateful for the opportunity to hear the story and to learn more about the stories behind Jackie French's new book since it will enrich the way that I am able to present ideas about Anzac Day for my class.
Jackie's new book is a history of Anzac Day itself, and not simply restricted to the events of 25th April, 1915 at Gallipoli.
This matches perfectly with what we are doing, which is looking at the story over time of our local memorial and its changing meaning and symbolism for people.
I remember as a child the concerns that Anzac Day was becoming redundant as less and less diggers were marching each year as they became more frail or passed away.
I know that my own attitude to Anzac Day has changed. I sometimes see it as a celebration of war, encouraging people to see violence and fighting as a way forward and this goes against the grain of my own beliefs. I respect that those who do serve their country do it with the best of intentions and I am grateful for their courage and bravery, but I am also angered by the way that young boys (and many of them were) were encouraged into a situation which would have been so horrible it can't be imagined, and they had no control over it.
I hope that by commemorating Anzac Day, we will look back at the atrocities of war and search for better ways of solving our problems now and in the future.
I think it is great that we have students in our schools from countries all over the world, who at one time would have been considered enemies just because of their heritage and now we can meet them as people and appreciate that we have more in common than not, and that peace and harmony are something worth striving for.
I'm just still not sure that guns and force are the best way to achieve this peace. Our students of today may find a new way to solve the problems of the future if they never forget the pain of the past.


Mother's Day - already?

It's not quite May yet, but Mother's Day is creeping up slowly and before we know it, it will have arrived.
I haven't quite settled on an exact idea for Mother's Day yet this year.
Last year it snuck up on me so quickly that my own dear mother had to come in and help me out! She assisted my darling Year 4s and 5s to bake sweet little cupcakes which they packaged up in a cute little box.
This year I am determined to get in before the last minute, but I would like it to be related to the rest of our learning too, so that it adds to what we are already doing and the students can get the most out of it.
I had thought about planting herb seeds last term since we were doing life stages in Science, but I was concerned that my thumbs were not so green and they would not result in healthy looking plants. Do you think mums would like limp herbs anyway? Maybe they would. At least with Year 2, anything they make will be considered sweet - it's the thought that counts, and when coupled with a toothless grin, it would be heart-melting!
Since we are doing "Mixing Things" in science, and I had already ruled out the plant thing (too late now, anyway) I am thinking bath bombs or bath crystals. We made soap a few years ago when I had Year 4, but I had ordered the stuff online and it took weeks to arrive, so again, I'm not organised enough for soap....
I googled "Mother's Day craft mix" to see what came up, and searched the images. I found a very simple recipe for cinnamon sugar (basically just cinnamon and sugar, LOL!)
This picture is from Mommy Cooks. Check their blog for the recipe too.
I think this would look great in a little bag with some pink ribbon if I can't find enough jars.
We have Year 5 buddies who I am sure would love to help us out so I just have to narrow down the plan and work out a time to do it!

What are you making this Mother's Day?

An Anzac Poem

One of the parents from my class happens to also teach Year 2 and they are doing a very similar unit to us at the moment. (You've got to love this Australian Curriculum - it makes collaboration easier!)
She was kind enough to share some of her planning ideas with me, and this included a reference to an Anzac Day Poem.
I googled it and found the poem here.
Here is the poem:
Why are they selling poppies, Mummy?
Selling poppies in town today.
The poppies, child, are flowers of love.
For the men who marched away.
But why have they chosen a poppy, Mummy?
Why not a beautiful rose?
Because my child, men fought and died

In the fields where the poppies grow.
But why are the poppies so red, Mummy?
Why are the poppies so red?
Red is the colour of blood, my child.
The blood that our soldiers shed.
The heart of the poppy is black, Mummy.
Why does it have to be black?
Black, my child, is the symbol of grief.
For the men who never came back.
But why, Mummy are you crying so?
Your tears are giving you pain.
My tears are my fears for you my child.
For the world is forgetting again.

Author Unknown
I love the simplicity of this poem - perfect for my Year 2s and it will go well with my poppy potato prints that I plan to do early next week.
I immediately decided I needed some comprehension questions to go with it so I whipped up a worksheet with some NAPLAN style multiple choice questions just for good measure.
You can download it for free from my TPT store.
Oh, and we made our slouch hats last week. They look great!

Friday, 20 April 2012

Parent Communication

Lorraine, from Fabulous Fourth Grade Froggies, is hosting a link party about Parent Communication and I thought I would join up, even though it is Friday night and just reading other people's run downs on all the amazing things they do is making me exhausted!
I totally agree with Lorraine's concerns about the possibilities of e-mail communication being misinterpreted. I am super conscious of this every time I type an email. I always worry that someone is going to take offence at something that was never intended to be offensive!
Having said that though, email remains my absolute favourite way of communicating with parents.
Since I got an iPhone two years ago, checking my emails on the run has become a habit. E-mail with most of my parents is reasonably quick and reliable, and since I have a good relationship with most of them, they will respond quickly if they are not sure about what I meant in a short message.
It is a problem for some parents that I like to communicate this way. I avoid paper copies because I am trying not to photocopy too much and I get frustrated by the number of notes left lying around the bag rack that will never make it home, despite the fact that each child has a special satchel in which to put notes and I always ask them to put their notes in there.
I e-mail the parents as a group at least once a week. I email the homework out on Fridays so that they have the weekend to do it if needed, and then it is due the following Friday. And I usually do an email about something we have been learning about in class, perhaps with some hints about follow up they might like to do with their own child if they think it is necessary.
The parents at my school are very dedicated to their children and are usually very busy, whether or not they work outside of the home or not. Between ballet lessons, rugby training and piano lessons, they and the students lead busy lives so a quick email is usually a good way to keep in touch.
Besides email, I have my class blog which chronicles our learning experiences and is a great way for parents to see what we are doing.
Each child also has a Reading Record book so the parents can record home reading, but I also use this book to keep their spelling and math test results in so parents can see these if they want.
I do occasionally make phone calls to parents, but I find that I am busy all day at school and then once I get home I am busy then too. Trying to find a quiet place to make a call can be a challenge!
I also get the chance to chat with many of the parents at drop off or pick up since many of them have little ones and they come into the school in the mornings or the afternoons.
So there you have it - not as formal and comprehensive as some of the amazing posts that I have read, but it works for me!

Money, money, money!

We are gearing up to study money with my Year 2 class so I am looking for interesting ways to get the kids plenty of practise with making different amounts.
According to the new Mathematics curriculum, they need to be able to count and order small collections of Australian notes and coins. I want them to have lots of hands-on practice with coins and notes.
While waiting for my dear husband to pick me up from work this afternoon, I had a brainwave so I came home and made these tags for my game idea.
I have called it The Shopkeepers Game. It is free from my TPT store.
Basically, the class is divided into two groups - shopkeepers and customers. It is a concentric circle game with the shopkeepers sitting on chairs in the centre and the customers moving to music around the outside, carrying their little purses of money.
When the music stops, the customers buy whatever is being sold by the nearest shopkeeper. (Is this just encouraging impulse buying???)
The shopkeeper needs to check that the amount is correct.
There are different coloured tags so that the game can be made easier or harder or to limit the game to coins only, or include notes and mixed denominations. The game could be made even more challenging by giving change.
I have made the game so that it could be used by anyone in a country that uses dollars and cents and there is nothing specifically Australian about the tags. They could just as easily be used in America or New Zealand.
I also think I might be able to use them for other games or assessments like matching to the amounts, and ordering the amounts. Since we are doing two digit addition as well, I might be able to use them for this too.
I am trying to make resources that I can use for multiple purposes to save time, money and resources. If you think of another use for these tags, I would be happy to hear about it.
I hope my kids enjoy this game. I'm sure they will - they love any chance to get out of their seats and make a bit of noise...
If you play it with your students, let me know how it goes! I'd love to hear about it.

Sunday, 15 April 2012

Using iMovie on the iPads

Last term I set myself the challenge of getting my Year 2 students to the point where they could make their own iMovies using our school iPads.
Of course they managed it because seven-year-olds are more confident with new technology than we are!
Each student created a short iMovie about the life stages of an animal. Because we had been looking at Eric Carle books, we used painted paper collage to create the images and the students talked about the pictures. I was pleased with their oral explanations because I know if I had asked them to write it down, I wouldn't have seen so much detail from a lot of my students. Using iMovie gave even the reluctant writers a chance to engage with the Science curriculum.

So how do they learn to do it?
Firstly, I needed to become a bit more comfortable with using and teaching with the iPads myself and I wanted to enlist some helpers to work with my Year 2s at first, so during my non-contact time one Friday, I headed over to our Year 5 buddies and taught them how to use the iPads to make a short iMovie. I knew there were a few students in this class who had some basic skills already because they were in my class last year and we had used the iPads, as well as Garageband on the computers, so they had some background skills.
After this one lesson, the Year 5s had a practice on their own as well, working on their own project. This quick tutorial meant that another teacher now had a basic knowledge of how to do it and I had 28 Year 5s who knew more than I did already.
Next, I worked with my Year 2s in small groups of 8 with 4 iPads to share. I did this during our Literacy rotations. I spent 20 minutes with the groups working in pairs to take a photo of the partner and record them reading a page from a book. They got to learn a few basics of iMovie through this experience, as well as how to take a photo, and they also learnt that they needed to speak clearly and hold the iPad close enough to get a good recording.
(I'm not suggesting they were experts by the end of twenty minutes, but some of them were confident, and at least they all had a basic understanding of what iMovie does.)
Next we worked on our unit, learning about life stages and the students created pictures with their collage.
I took some photos of our seed growing experiment and loaded them onto each of the 10 iPads, ready for our buddy work.
The Year 5 buddies worked with my Year 2s to select and sequence the photos of the seeds, change the timings and record the Year 2 explanations of the stages of a seedling sprouting. The Year 5s knew more than me by now so my Year 2s had great teachers!
We viewed our seedling movies and discussed what we had learnt about making movies.
The final stage was the students creating their own iMovie about their chosen animal or plant.
I was lucky enough to have my prac teacher there on the day that we did it so she was able to work with individuals as they took turns with the iPads, and I taught the rest of the class.
Having Claire there to help was great because she was able to send all of the iMovies to DropBox for me so I could collect them in one place where I could access them. She also named all the files properly and kept check that we hadn't missed anyone.
I was very pleased with their efforts - we still have room for improvement, but I am amazed at what these kids can do with just a little bit of guidance.
This term we will use iMovie again, but I also want to try Sonic Pics to compare it to iMovie.

Saturday, 14 April 2012

Anzac Biscuit Science and English

I love a good science experiment and a chance to get messy, so I am cooking up a storm this week! Well, cooking up a batch of Anzac Biscuits, actually.
I have developed a series of ideas around the idea of Anzac Biscuits that will tie in nicely with our History unit on the Anzac Memorial.
I have linked the lessons to the Australian Curriculum for both Science and English for Year 2, but the activities could be useful to anyone who wants to do some science and writing about cooking.
The first part of the lesson (or series of lessons really) is the Science. Our Science concept this term from the Year 2 Australian Curriculum is: Different materials can be combined, including by mixing, for a particular purpose (ACSSU031)
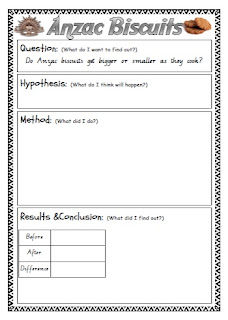
The experiment question looks at the changing size of the biscuits as they cook, so it really addresses the Science Inquiry Skills - making predictions, participating in guided investigations, measuring, comparing observations etc.
Download the science experiment for free at my TPT store.
After the science and cooking part, I will look at the recipe itself. I have made a file with a number of resources in it to support these activities.
You can find it at my TPT store also.
The students will complete a cloze activity for the procedure text which draws attention to the verbs used in the text. This highlights they way that most of the instructions begin with the verb. The words are written in the right order down the bottom of the page. It is not really designed for a comprehension test - more a lesson on procedures.
The next page is a comprehension page (NAPLAN style multiple choice - just so they have been exposed to this style of question) and then a reflective activity on the cooking which looks at adjectives.
I plan to do a joint construction of a recount of the cooking and we will post it on our class blog. I have made a sheet in case someone wants to do individual written recounts. Or maybe I will change my mind between now and then, and at least I will be prepared.
Finally, I will compare the two different texts - the procedure and the recount. I have made an Anzac cookie Venn diagram worksheet which we will probably do in small groups during literacy blocks.

Anzac Day Poppy Potato Prints!

As part of our History study this term we will be looking at Anzac Day, and in particular focusing on our local war memorial as well as other symbols associated with the day.
I love using simple craft activities to help introduce new concepts to my class. Not only do they learn more when having fun, their products really brighten up our room and are a good reminder of key ideas in future weeks.
Poppies have been associated with Anzac Day since the 1920s. The red poppy reminds us of the sacrifice - the blood lost - in war. Poppies are also significant because these flowers grow naturally in the fields on the Western Front where many soldiers fought and died.
To teach my students about these pretty flowers that have such a sad significance, I am going to make some simple potato prints. I had a practice run with my nephew this afternoon.
To make these pretty poppies, you need to cut a simple flower shape from a potato and use red paint to make the prints. To make the black centres, I used real poppy seeds which can be easily and cheaply purchased from the supermarket. A dab of glue in the centre was enough to hold them in place.
When I make these with my class next week, I will put the sheet of paper in a paper box lid so they can shake the seeds around easily and keep reusing the bits that fall off. This should mean less little black seeds all over the room too, I hope!

If you are doing Anzac Day activities with your class, you might also like to try my Anzac Day Slouch Hat craft.

Wednesday, 11 April 2012

Being Prepared!

We start Term 2 in only a few days and then we have only six weeks until reports are due! We haven't even started back and the deadline seems incredibly close.

This year I am determined to be prepared, organised and ready so that I will avoid the usual stress that most teachers associate with writing reports.

I was pretty organised in Term 1 so I feel like I am well on the way already. Today I went into work and spent a little bit of time filing and organising the assessment pieces I have from last term (we write semester reports so it will be based on Term 1 and the first half of Term 2). It didn't take very long to get organised (about an hour??) and now I can see what else I need to collect before I write the reports.

I use a system that I have developed over the past few years for organising student work samples. I prefer to colleect them according to the assessment piece and then enter data into a spreadsheet for a summary and use the summary to write the first draft of the reports. I later sort the samples into a folio for each child so that I have this to give to parents at the Parent Teacher Interviews.

For the last few years though, I have been teaching bigger kids and they were able to do most of the filling of their own folios. I think it is valuable for them to be involved in the process. I am not so sure if this will work with my Year 2s and I will probably have to fill 24 folios on my own...

Here is a picture of the manilla folder system I use for the assessment pieces. I glue a strip with the students names down one side and then I can tick off whose pieces I have. Sometimes a student was away on the day I collected the work, or they didn't finish it, or they hid it in their desk. I can easily see if I need to follow anybody up.
I have recorded the name of the task or a description in blue at the top of the folder and written the key subject area in orange on the front, as well as "Term 1" in purple. If there is more than one subject assessed in one piece (lots of them include English...) then I write all of the relevant subjects down the side strip.

Inside the folder I have put all of the samples into alphabetical order so it should be easier when it comes to the folio filling job.

Here is a photo of one of the criteria sheets. I have tried to develop something that is simple enough for parents to understand (and older students) as well as having all the details that are required by my principal (links to Australian Curriculum documents etc).
I find this style of checklist to be easy to write, quick to mark and useful for showing more than one subject area on a page. There is usually enough space on the page to include comments about the work habits as well.
I am pleased with the basic design of these criteria sheets because I think they look neat in the folios and meet the needs of all stakeholders (students, parents, administration and me!).

How do you organise student work prior to report writing? Do you collect it by task, subject or student?
If you have any ideas, please leave them as a comment so that we can all help to make report writing time a little less stressful...

Monday, 2 April 2012

My own iBook!

I have discovered a simple way to turn a PowerPoint slide into an iBook that can be read on an iPad! Now I can have lots of fun making these simple iBooks for my students to read.

I simply created a slideshow using PowerPoint, then saved it as a PDF. Next, I uploaded the PDF file to my Dropbox, then sent the file to iBooks once I had it on the iPad.

It sits neatly on my shelf.

Here is a PDF of a slideshow about a war memorial that might be useful for teaching about Australian history or Anzac Day.


The pages display very nicely on the iPad and it will be great that my students will be able to review the information on their own after I introduce the slideshow to the class. They are going to make a concept map about the War Memorial, so the iBooks will be another way for them to access the information without me having to print out pages of black and white worksheets. They can zoom in and out on the photographs so easily. This will be a great way for them to be able to access the sources themselves so they can pose better questions.

I'm so excited - I might go and make another one!

Greetings and Salutations!

Howdy! Hi! Hello! G'Day!

How many ways can we say hello?

Inspired by Chapter 5 in Charlotte Web by E.B. White, I have created a simple PowerPoint presentation with various greetings and a Charlotte's Web theme.
The Australian Curriculum for English for Year 2 requires that students
understand that language varies when people take on different roles in social and classroom interactions and how the use of key interpersonal language resources varies depending on context.
This simple presentation that you can download for free can be adapted to suit your own needs and to add in greetings that your children might either use or have heard.

The slides can be used on a whiteboard projector to promote discussion about the different greetings that are used in different situations.
This is a great opportunity to practise manners and talk about the different expectations in various contexts and audiences.

The slides could be printed one to a page and laminated for a classroom bulletin board display, or they could be printed with several to a page to make small cards for activities.

An interesting activity would be to do a Silent Card Shuffle to sort the greetings from casual to formal.

Students could brainstorm more greetings and easily add more slides to the set.

Let me know how you would use these slides in your classroom!

A History Unit for Anzac Day

The Year 2 History component of the Australian Curriculum requires that students know
the history of a significant person, building, site or part of the natural environment in the local community and what it reveals about the past
and that they understand
the importance today of an historical site of cultural or spiritual significance; for example, a community building, a landmark, a war memorial.
Next term, with Anzac Day occuring in the first few weeks, it seems timely to study our local war memorial as we develop some of the history skills that my students will need later in the term when we study our local Show.
I am posting my unit plan here in case it is of use to others. I am so far enjoying implementing the new Australian Curriculum, but it would be great to see what other people are doing so I can know if I am interpreting it as the writers intended. I figure if I post my plans, perhaps others might either do the same, or at least give me some feedback about what they are doing with the new History curriculum.
I am really keen to provide engaging and motivating learning experiences for my students and to avoid too many worksheets. I have used the 5Es Inquiry Process as a structure for the planning - Engage, Explore, Explain, Elaborate, Evaluate. There are three assessment items for this unit.

There are two files to download because I made it a PDF and one of the pages is landscape so it is a separate file.
Anzac History Plan File 1
Anzac History Plan File 2

Lest We Forget

Anzac Day is approaching so I am creating some activities that will be suitable for Australian and New Zealand children to commemorate this special day.
This simple Slouch Hat Craft will be a great Anzac Day Craft Activity.
Slouch hats were worn by the diggers in World War I. The Light Horsemen proudly wore slouch hats adorned with an emu feather plume.
If you can find emu feathers this would be an interesting touch, otherwise a chicken feather might be easier to come by! I made my feather in the photo out of paper. Even a paper feather gives the effect, although I think real emu feathers would make this Anzac craft much more special.

I plan to use painted paper for my craft, but this mock up done with ordinary coloured paper still gives you the idea.
To purchase the pattern and instructions for this Anzac Day Craft, visit my TPT store.
This craft idea could support the Australian History Curriculum for Year 2 or Year 3.